
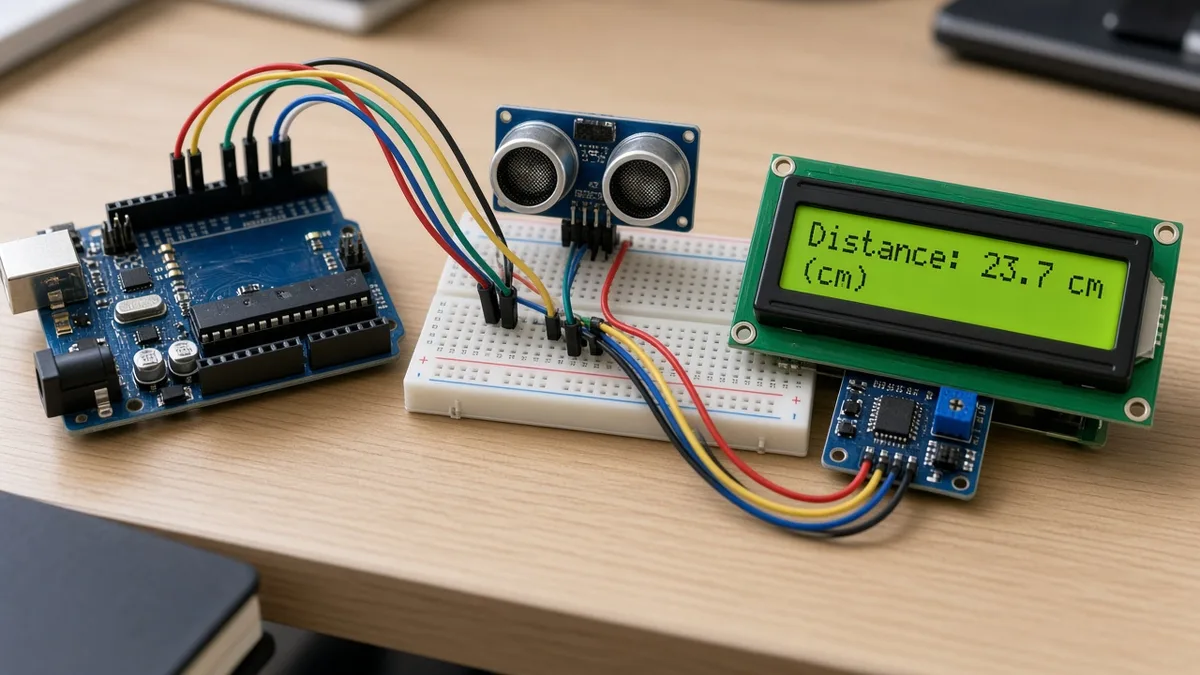
Make an ultrasonic distance meter with Arduino Uno, HC-SR04 and a 16×2 I2C LCD. Pin-to-pin wiring, complete code, step-by-step guide and fixes.
Need it ready-made? Buy Ready Project
An ultrasonic distance meter with Arduino, HC-SR04 and a 16×2 I2C LCD is a classic beginner project that is genuinely useful: measure room dimensions, build a parking sensor, check a water tank level or make an obstacle detector for a robot. In this tutorial the Arduino Uno fires an ultrasonic pulse, times the echo, converts it to centimetres and inches, averages five readings for stability and shows the result on an LCD that needs only four wires thanks to its I2C backpack.
How the HC-SR04 Works
The HC-SR04 has two “eyes”: one transmitter and one receiver. When the TRIG pin receives a 10-microsecond HIGH pulse, the module sends a burst of eight 40 kHz sound pulses. The ECHO pin then goes HIGH and stays HIGH until the reflected sound returns. The length of that HIGH pulse is the round-trip time. Sound travels at about 343 m/s (0.0343 cm/µs) at room temperature, so distance (cm) = duration × 0.0343 / 2; we divide by 2 because the sound goes to the object and back. The sensor is rated for roughly 2 cm to 400 cm.
Components Required
- Arduino Uno R3 (or Nano) – 1
- HC-SR04 ultrasonic sensor – 1
- 16×2 LCD with I2C backpack (PCF8574, address 0x27 or 0x3F) – 1
- Breadboard and jumper wires
- USB cable (Type-B for Uno)
Wiring Table (Pin-to-Pin)
| Module | Module Pin | Arduino Uno Pin | Notes |
|---|---|---|---|
| HC-SR04 | VCC | 5V | Needs 5 V |
| HC-SR04 | TRIG | D9 | TRIG_PIN = 9 |
| HC-SR04 | ECHO | D10 | ECHO_PIN = 10 (5 V logic is fine on Uno) |
| HC-SR04 | GND | GND | |
| I2C LCD | VCC | 5V | |
| I2C LCD | GND | GND | |
| I2C LCD | SDA | A4 | Uno I2C data (also the SDA header pin) |
| I2C LCD | SCL | A5 | Uno I2C clock (also the SCL header pin) |
Libraries Used
- LiquidCrystal I2C by Frank de Brabander (Library Manager name “LiquidCrystal I2C”; source: johnrickman/LiquidCrystal_I2C – see the repository for license terms).
Wire.h– built into the Arduino AVR core.- No library is needed for the HC-SR04; the timing code below is original and uses the built-in
pulseIn().
Complete Arduino Code
// Arduino Uno Distance Meter - HC-SR04 + 16x2 I2C LCD
// Library: "LiquidCrystal I2C" by Frank de Brabander
#include <Wire.h>
#include <LiquidCrystal_I2C.h>

const int TRIG_PIN = 9;
const int ECHO_PIN = 10;
LiquidCrystal_I2C lcd(0x27, 16, 2);   // try 0x3F if the screen stays blank

void setup() {
  Serial.begin(9600);
  pinMode(TRIG_PIN, OUTPUT);
  pinMode(ECHO_PIN, INPUT);
  lcd.init();
  lcd.backlight();
  lcd.setCursor(0, 0);
  lcd.print("Distance Meter");
  delay(1000);
}

float readDistanceCm() {
  digitalWrite(TRIG_PIN, LOW);
  delayMicroseconds(2);
  digitalWrite(TRIG_PIN, HIGH);      // 10 us trigger pulse
  delayMicroseconds(10);
  digitalWrite(TRIG_PIN, LOW);
  unsigned long duration = pulseIn(ECHO_PIN, HIGH, 30000UL); // timeout ~5 m
  if (duration == 0) return -1;      // no echo
  return duration * 0.0343 / 2.0;    // speed of sound 343 m/s, there and back
}

void loop() {
  // average 5 readings for a steadier value
  float total = 0; int good = 0;
  for (int i = 0; i < 5; i++) {
    float d = readDistanceCm();
    if (d > 0) { total += d; good++; }
    delay(30);
  }
  lcd.clear();
  lcd.setCursor(0, 0);
  lcd.print("Distance:");
  lcd.setCursor(0, 1);
  if (good == 0) {
    lcd.print("Out of range");
    Serial.println("Out of range");
  } else {
    float cm = total / good;
    lcd.print(cm, 1);
    lcd.print(" cm ");
    lcd.print(cm / 2.54, 1);
    lcd.print(" in");
    Serial.print(cm, 1);
    Serial.println(" cm");
  }
  delay(300);
}
Code Explanation
- readDistanceCm() sends the 10 µs trigger, measures the echo with
pulseIn()and converts microseconds to centimetres. - Timeout of 30,000 µs means that if nothing reflects within ~5 m, the function returns −1 instead of freezing for a full second (the default pulseIn timeout).
- Averaging: five readings 30 ms apart are averaged, ignoring failed ones, which removes most jitter.
- LCD output: line 1 shows “Distance:”, line 2 shows the value in cm and inches, or “Out of range”.
- Readings also go to the Serial Monitor at 9600 baud for debugging.
Step-by-Step Instructions
- Connect the 5V and GND pins of the Uno to the breadboard rails.
- Insert the HC-SR04 and wire VCC → 5V, TRIG → D9, ECHO → D10, GND → GND.
- Wire the I2C LCD: VCC → 5V, GND → GND, SDA → A4, SCL → A5.
- In Arduino IDE install “LiquidCrystal I2C” by Frank de Brabander from Library Manager.
- Paste the code, select Arduino Uno and the port, and Upload.
- The LCD shows “Distance Meter”, then live readings. Point the sensor at a wall and move it closer and farther.
- If the screen lights up but shows only blocks or nothing, turn the small blue contrast potentiometer on the I2C backpack with a screwdriver.
- Check accuracy with a measuring tape; for most surfaces you should be within about 1 cm.
Troubleshooting
| Problem | Fix |
|---|---|
| LCD backlight on but no text | Adjust the contrast potentiometer; try address 0x3F instead of 0x27 (run an I2C scanner). |
| Always “Out of range” | TRIG and ECHO swapped, or sensor not on 5 V. Check D9/D10. |
| Readings jump around | Soft or angled surfaces scatter sound – aim at a flat hard surface; keep averaging on. |
| Reads 0 or very small values | Object closer than 2 cm (blind zone). |
| Compile error about LiquidCrystal_I2C | Make sure you installed the Frank de Brabander version; other forks use lcd.begin() instead of lcd.init(). |
Project Ideas Using This Circuit
- Car parking assistant with a buzzer that beeps faster as you get closer.
- Water tank level indicator (mount the sensor on the lid, pointing down).
- Touchless dustbin with a servo lid.
- Obstacle-avoiding robot car.
Frequently Asked Questions
Can I use the HC-SR04 with ESP32?
Yes, but ECHO outputs 5 V. Use a voltage divider (e.g., 1 kΩ and 2 kΩ) on ECHO, or buy the 3.3 V-compatible HC-SR04P.
How accurate is the HC-SR04?
About ±3 mm in ideal conditions; real-world accuracy is around ±1 cm. Temperature changes the speed of sound slightly.
Why use an I2C LCD instead of a normal 16×2?
A normal 16×2 LCD needs six data pins plus a potentiometer; the I2C version needs only SDA and SCL.
Can I show the distance in millimetres?
Yes, multiply the cm value by 10 before printing.
Related Projects
- Arduino Mega Smart Parking System with RFID
- Arduino Clap Switch with KY-038 Sound Sensor
- Automatic Plant Watering System with Arduino
- IR Remote Controlled Stepper Motor with Arduino
Browse more Arduino Projects on Arduino Project Hub.
3 thoughts on “Arduino Ultrasonic Distance Meter with HC-SR04 and 16×2 I2C LCD”