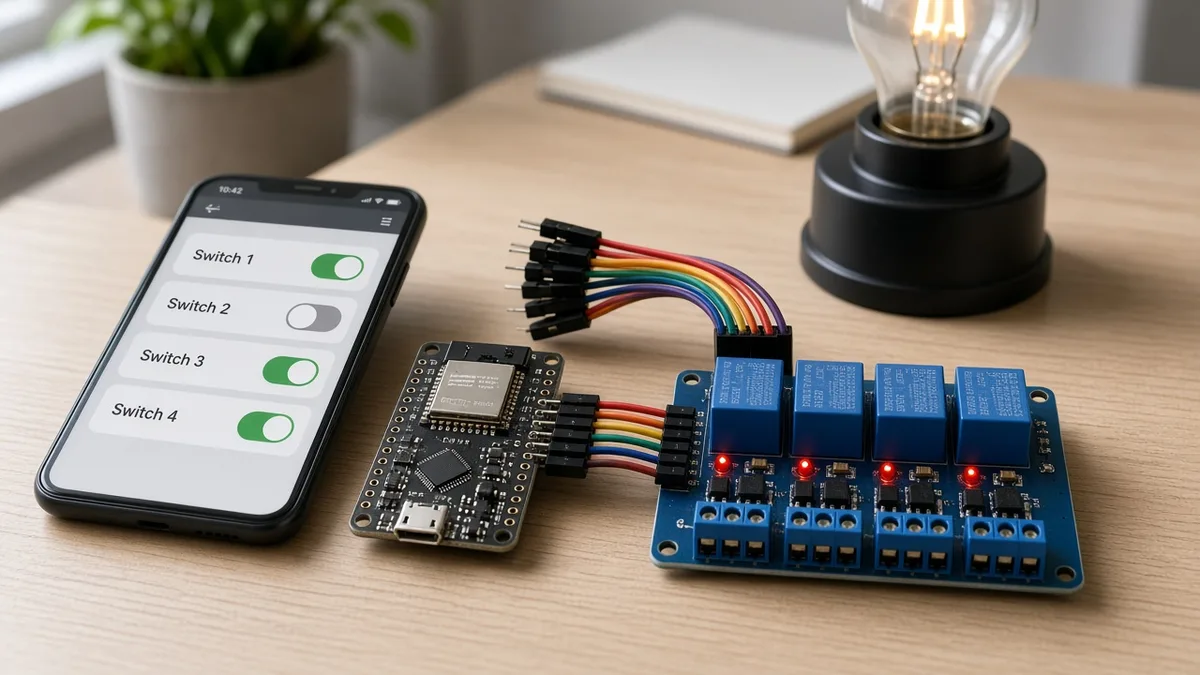
Make a Wemos D1 Mini (ESP8266) MQ-2 gas and smoke leak detector with buzzer, LEDs and a live Wi-Fi web dashboard. Wiring table, A0 resistor trick, tested code, calibration and Hindi explanation.
Need it ready-made? Buy Ready Project
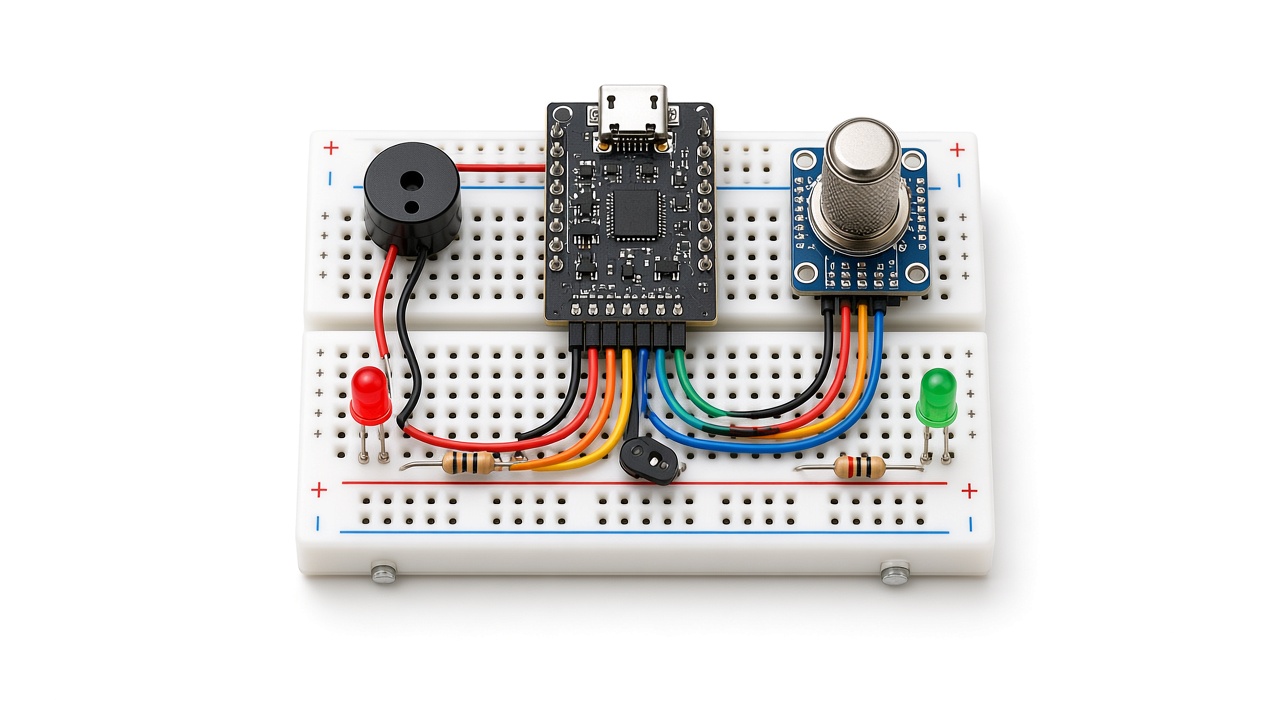
A gas leak in the kitchen is one of those problems you want to know about immediately, even when you are not in the room. In this beginner-friendly project we build a Wemos D1 Mini (ESP8266) MQ-2 gas and smoke leak detector with a loud buzzer, red/green status LEDs and a live Wi-Fi web dashboard that you can open on any phone connected to your home network. No app, no cloud account and no extra library is needed – everything uses the libraries that come with the ESP8266 Arduino core.
The MQ-2 reacts to LPG, propane, methane, butane, hydrogen, alcohol vapour and smoke, so it is ideal for a demonstration of a kitchen or workshop alarm. You will get the parts list, a pin-to-pin wiring table (including the important resistor trick for the D1 Mini analog pin), compile-tested code, a step-by-step build, calibration tips, troubleshooting and a FAQ, plus a simple Hindi explanation.
Safety note: this is a learning project, not a certified safety device. Hobby MQ sensors are not calibrated and can drift. Always keep a certified LPG/CO detector in your home and follow local safety rules.
How the MQ-2 Sensor Works
Inside the MQ-2 is a small tin-dioxide (SnO₂) sensing element heated by a tiny coil. In clean air its resistance is high. When combustible gas or smoke reaches the hot surface, the resistance falls. The breakout board turns this into a voltage on the AO (analog output) pin – more gas means a higher voltage. The board also has a DO pin with an on-board comparator and potentiometer, but we use AO so the software can show the actual level and you can change the alarm threshold in code.
Because the heater needs to reach a stable temperature, the readings are not reliable for the first minute after power-on (and the very first use of a new sensor needs a longer “burn-in” of several hours). The code therefore ignores alarms for the first 60 seconds and shows “Sensor warming up” on the web page.
Components Required
- Wemos D1 Mini (ESP8266) – 1
- MQ-2 gas sensor module (4-pin: VCC, GND, DO, AO) – 1
- 180 kΩ resistor – 1 (for the analog input, explained below)
- Active 5 V buzzer module or active buzzer – 1
- Red LED and green LED – 1 each
- 220 Ω resistors – 2 (for the LEDs)
- Breadboard, jumper wires and a micro-USB cable (5 V, 1 A USB adapter recommended because the MQ-2 heater draws about 150 mA)
Wiring Table (Pin-to-Pin)
| Module | Module Pin | D1 Mini Pin | Notes |
|---|---|---|---|
| MQ-2 | VCC | 5V | Heater needs 5 V |
| MQ-2 | GND | G (GND) | |
| MQ-2 | AO | A0 through a 180 kΩ resistor | Resistor in series between AO and A0 – see below |
| MQ-2 | DO | Not connected | Optional comparator output |
| Active buzzer | + (I/O) | D5 (GPIO14) | BUZZER_PIN = D5 |
| Active buzzer | – | G (GND) | |
| Red LED | Anode (long leg) | D6 (GPIO12) via 220 Ω | RED_LED = D6 – alarm |
| Green LED | Anode (long leg) | D7 (GPIO13) via 220 Ω | GREEN_LED = D7 – air OK |
| Both LEDs | Cathode (short leg) | G (GND) |
Why the 180 kΩ resistor?
The ESP8266 chip can only measure 0–1.0 V. The D1 Mini has a built-in voltage divider (220 kΩ + 100 kΩ) so its A0 pin accepts up to about 3.2 V. The MQ-2 module is powered from 5 V, so its AO can rise close to 5 V in strong gas. Adding 180 kΩ in series makes the total divider (180 k + 220 k) : 100 k, which scales 5.0 V to exactly 1.0 V at the chip. This protects the input and uses the full 0–1023 range.
Libraries Used (with Licenses)
- ESP8266 Arduino core (includes
ESP8266WiFiandESP8266WebServer) – github.com/esp8266/Arduino – LGPL-2.1 license. - No third-party library is required. The sketch and the small HTML/JavaScript dashboard are original code written for this article.
Complete Wemos D1 Mini Code
Board used for the compile test: LOLIN(WEMOS) D1 R2 & mini (esp8266 core 3.x). Replace the Wi-Fi name and password before uploading.
// Wemos D1 Mini (ESP8266) MQ-2 Gas / Smoke Leak Detector with Web Dashboard
// Buzzer + red/green LEDs, live page at http://<ip>/ and JSON at /data
// Uses only libraries bundled with the ESP8266 Arduino core
#include <ESP8266WiFi.h>
#include <ESP8266WebServer.h>

const char* WIFI_SSID = "YOUR_WIFI_NAME";
const char* WIFI_PASS = "YOUR_WIFI_PASSWORD";

const int GAS_PIN    = A0;   // MQ-2 AO (through 180k series resistor)
const int BUZZER_PIN = D5;   // GPIO14, active buzzer (+)
const int RED_LED    = D6;   // GPIO12, via 220 ohm
const int GREEN_LED  = D7;   // GPIO13, via 220 ohm

int threshold = 400;                      // ADC value (0-1023) that triggers the alarm
const unsigned long WARMUP_MS = 60000UL;  // MQ-2 heater warm-up time
int gasValue = 0;
bool alarmOn = false;

ESP8266WebServer server(80);

const char PAGE[] PROGMEM = R"rawliteral(
<!DOCTYPE html><html><head><meta name="viewport" content="width=device-width,initial-scale=1">
<title>Gas Monitor</title>
<style>body{font-family:Arial;text-align:center;background:#f4f6f8}
.card{background:#fff;max-width:340px;margin:30px auto;padding:20px;border-radius:12px;box-shadow:0 2px 8px #0002}
#v{font-size:48px;font-weight:bold}#s{font-size:22px;padding:8px;border-radius:8px;color:#fff}</style></head>
<body><div class="card"><h2>MQ-2 Gas Monitor</h2><div id="v">--</div><p>ADC value (0-1023)</p>
<div id="s">Loading...</div><p>Threshold: <span id="t"></span></p></div>
<script>
async function upd(){try{const r=await fetch('/data');const d=await r.json();
document.getElementById('v').textContent=d.gas;document.getElementById('t').textContent=d.threshold;
const s=document.getElementById('s');
if(d.warmup){s.textContent='Sensor warming up';s.style.background='#888';}
else if(d.alarm){s.textContent='GAS DETECTED!';s.style.background='#d32f2f';}
else{s.textContent='Air OK';s.style.background='#2e7d32';}}catch(e){}}
setInterval(upd,1000);upd();
</script></body></html>)rawliteral";

void handleRoot() {
  server.send_P(200, "text/html", PAGE);
}

void handleData() {
  bool warming = millis() < WARMUP_MS;
  String json = "{\"gas\":" + String(gasValue) +
                ",\"threshold\":" + String(threshold) +
                ",\"alarm\":" + String(alarmOn ? "true" : "false") +
                ",\"warmup\":" + String(warming ? "true" : "false") + "}";
  server.send(200, "application/json", json);
}

int readGasAverage() {
  long sum = 0;
  for (int i = 0; i < 10; i++) {
    sum += analogRead(GAS_PIN);
    delay(5);
  }
  return sum / 10;
}

void setup() {
  Serial.begin(115200);
  pinMode(BUZZER_PIN, OUTPUT);
  pinMode(RED_LED, OUTPUT);
  pinMode(GREEN_LED, OUTPUT);
  digitalWrite(BUZZER_PIN, LOW);
  digitalWrite(RED_LED, LOW);
  digitalWrite(GREEN_LED, LOW);

  WiFi.mode(WIFI_STA);
  WiFi.begin(WIFI_SSID, WIFI_PASS);
  Serial.print("Connecting to WiFi");
  unsigned long start = millis();
  while (WiFi.status() != WL_CONNECTED && millis() - start < 20000) {
    delay(500);
    Serial.print(".");
  }
  Serial.println();
  if (WiFi.status() == WL_CONNECTED) {
    Serial.print("Open http://");
    Serial.println(WiFi.localIP());
  } else {
    Serial.println("WiFi failed - alarm still works offline");
  }

  server.on("/", handleRoot);
  server.on("/data", handleData);
  server.begin();
}

void loop() {
  server.handleClient();

  static unsigned long lastRead = 0;
  if (millis() - lastRead >= 500) {
    lastRead = millis();
    gasValue = readGasAverage();
    bool warming = millis() < WARMUP_MS;
    alarmOn = !warming && gasValue >= threshold;

    digitalWrite(RED_LED, alarmOn ? HIGH : LOW);
    digitalWrite(GREEN_LED, (!alarmOn && !warming) ? HIGH : LOW);
    Serial.printf("Gas: %d  %s\n", gasValue, warming ? "(warming up)" : (alarmOn ? "ALARM" : "OK"));
  }

  // beep pattern while alarm is active: 200 ms on / 200 ms off
  if (alarmOn) {
    digitalWrite(BUZZER_PIN, (millis() / 200) % 2 ? HIGH : LOW);
  } else {
    digitalWrite(BUZZER_PIN, LOW);
  }
}
Code Explanation
- readGasAverage() takes 10 analog readings 5 ms apart and averages them to reduce noise.
- threshold = 400: when the averaged value reaches 400 (of 1023) the alarm turns on. Calibrate this for your sensor (see below).
- WARMUP_MS: for the first 60 s the alarm is disabled and both LEDs stay off while the heater stabilises.
- Non-blocking design: the sensor is read every 500 ms using
millis(), so the web server keeps responding instantly. The buzzer beeps 200 ms on / 200 ms off usingmillis() / 200. - Web dashboard:
/serves a small HTML page stored in flash (PROGMEM). Its JavaScript calls/dataevery second and updates the number and the coloured status box without reloading the page. - /data returns JSON like
{"gas":182,"threshold":400,"alarm":false,"warmup":false}, which you can also read from Home Assistant, Node-RED or a Python script. - If Wi-Fi does not connect within 20 s the detector still works offline with the buzzer and LEDs.
Step-by-Step Build Instructions
- Install the ESP8266 boards package: add
https://arduino.esp8266.com/stable/package_esp8266com_index.jsonin File → Preferences → Additional Boards Manager URLs, then install “esp8266” from Boards Manager. - Plug the D1 Mini into the breadboard. Connect its 5V and G pins to the rails.
- Connect the MQ-2: VCC → 5V, GND → G. Put the 180 kΩ resistor between the AO pin and A0.
- Connect the buzzer (+) to D5 and (–) to GND. Connect the red LED to D6 and the green LED to D7, each through a 220 Ω resistor, with the short legs to GND.
- Open the code, enter your Wi-Fi name and password, select LOLIN(WEMOS) D1 R2 & mini and the COM port, and upload.
- Open the Serial Monitor at 115200 baud. Note the IP address printed, e.g.
Open http://192.168.1.45. - Open that address in your phone browser (same Wi-Fi). For one minute you will see “Sensor warming up”, then “Air OK” with the green LED on.
- Test safely: hold an unlit lighter near the sensor and press the gas button briefly for one second. The value rises, the red LED lights, the buzzer beeps and the page turns red. Never use an open flame.
Calibrating the threshold
Let the sensor run for at least 15 minutes in clean air and note the typical value (often 80–250). Set threshold to roughly 2× that value for a sensitive alarm, or higher to avoid false alarms from cooking fumes. Upload again after changing it.
सरल हिंदी में समझें (Simple Hindi Explanation)
इस प्रोजेक्ट में MQ-2 सेंसर हवा में LPG, धुआँ (smoke) या दूसरी ज्वलनशील गैस को पहचानता है। जितनी ज़्यादा गैस, उतना ज़्यादा वोल्टेज AO पिन पर आता है। Wemos D1 Mini इस वोल्टेज को A0 पिन से पढ़ता है। क्योंकि D1 Mini का A0 सिर्फ लगभग 3.2V तक ही सह सकता है, इसलिए हम बीच में 180kΩ रेज़िस्टर लगाते हैं ताकि 5V सुरक्षित रूप से नापा जा सके।
जब वैल्यू तय सीमा (threshold = 400) से ऊपर जाती है, तो लाल LED जलती है और buzzer बजता है। सामान्य हवा में हरी LED जलती है। साथ ही D1 Mini अपने Wi-Fi से एक छोटा वेब पेज चलाता है – मोबाइल पर IP एड्रेस खोलकर आप लाइव गैस वैल्यू देख सकते हैं। ध्यान रखें: चालू होने के बाद सेंसर को गर्म होने में लगभग 1 मिनट लगता है, और यह केवल सीखने का प्रोजेक्ट है – असली सुरक्षा के लिए सर्टिफाइड गैस डिटेक्टर ज़रूर लगाएँ।
Troubleshooting
| Problem | Fix |
|---|---|
| Value is always 1023 | A0 is overloaded – check that the 180 kΩ resistor is in series, not to ground. Make sure AO (not DO) is used. |
| Value is always 0 or very low | AO wire loose or MQ-2 not powered. The sensor should feel warm after a minute. |
| Alarm triggers immediately after warm-up | A brand-new sensor needs a burn-in of several hours. Run it overnight, then raise the threshold if needed. |
| Web page does not open | Phone must be on the same Wi-Fi network. Check the IP in Serial Monitor. 5 GHz-only networks are not supported by the ESP8266 – use 2.4 GHz. |
| D1 Mini resets when the buzzer sounds | The USB supply is too weak. Use a 5 V 1 A adapter and a short, good USB cable. |
| Buzzer makes only a click | You have a passive buzzer. Use an active buzzer, or replace digitalWrite with tone(BUZZER_PIN, 2000). |
Ideas to Extend the Project
- Add a relay module to switch on an exhaust fan when gas is detected.
- Send a Telegram or email notification when the alarm triggers.
- Add a DHT22 so the dashboard also shows temperature and humidity.
- Log values to Google Sheets or ThingSpeak for long-term trends.
Frequently Asked Questions
Can the MQ-2 show the gas concentration in ppm?
Only approximately. Converting to ppm requires measuring the sensor resistance in clean air (R0) and using the curves in the datasheet. For an alarm, a raw threshold is simpler and more reliable.
Can I use a NodeMCU instead of the D1 Mini?
Yes. NodeMCU boards also have a divider on A0 (usually the same 220k/100k). Use the same pin names (D5, D6, D7) and select “NodeMCU 1.0” as the board.
Which gases does the MQ-2 detect?
LPG, propane, butane, methane, hydrogen, alcohol and smoke. For carbon monoxide use an MQ-7; for general air quality use an MQ-135.
Can I use the DO pin instead?
Yes – DO goes LOW when gas passes the threshold set by the blue potentiometer on the module. You would then read it with digitalRead, but you lose the live level on the dashboard.
Is it safe to leave it running all the time?
The circuit itself is low-power and safe, but the MQ-2 heater runs continuously and gets warm. Mount it in a ventilated enclosure away from water, and remember it is not a certified alarm.
Related Projects
- Wemos D1 Mini Rain Detector with Wi-Fi Alert
- ESP8266 NodeMCU 4-Relay Home Automation
- ESP32 DHT11 Weather Station with Web Server
- Heart and Pulse Monitoring System with ESP32
Browse more ESP8266 Projects on Arduino Project Hub.